Notice: Undefined variable: kategorija_naslov in /home/johnroe/public_html/product_detailed.php on line 105
Notice: Undefined variable: page_title in /home/johnroe/public_html/product_detailed.php on line 188
Notice: Undefined variable: page_short in /home/johnroe/public_html/product_detailed.php on line 196

GEOTUB Panel is a plastic ABS formwork, resistant to UV rays and chemical agents.
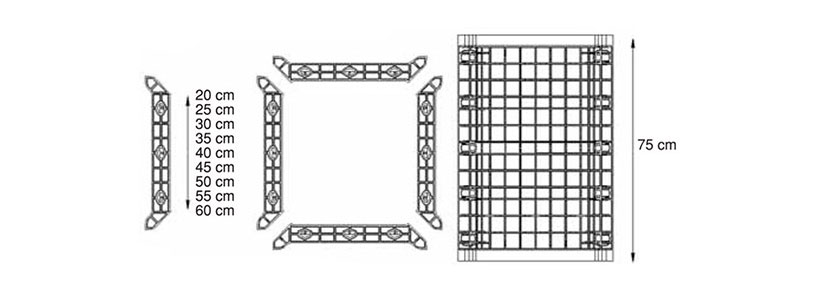
Technical and packaging data |
|
| MATERIALS | ABS |
| CHAMFER | 1 cm a 45° |
| PANELS SIZES | |
| GEOTUB PANEL 20 | 20 cm x H 75 cm |
| GEOTUB PANEL 23 (9") | 23 (9") cm x H 75 (35") cm |
| GEOTUB PANEL 25 | 25 cm x H 75 cm |
| GEOTUB PANEL 30 | 30 cm x H 75 cm |
| GEOTUB PANEL 35 | 35 cm x H 75 cm |
| GEOTUB PANEL 40 | 40 cm x H 75 cm |
| GEOTUB PANEL 45 | 45 cm x H 75 cm |
| GEOTUB PANEL 50 | 50 cm x H 75 cm |
| GEOTUB PANEL 55 | 55 cm x H 75 cm |
| GEOTUB PANEL 60 | 60 cm x H 75 cm |
GEOTUB Panel is a plastic ABS formwork, resistant to UV rays and chemical agents. The panels are very light so that they can easily be moved by hand and they can also be assembled by a single person. The product is reusable if you carry out the right assembly and dismantling. The internal surface is particularly smooth. Moreover, the material's nature permits to give an open- face stone aspect to the product, but also it permits the shuttering and stripping of the pilars and of the columns without the use of special mold oils.
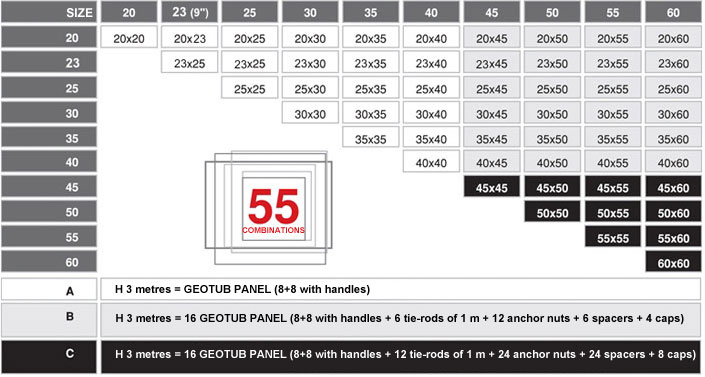
GEOTUB Panel INSTALLATION
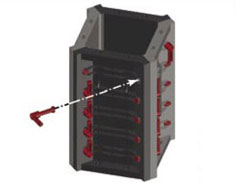
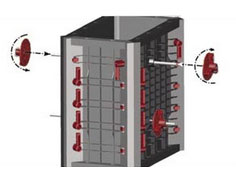
All the handles need to be arranged and fixed in the suitable holes to guarantee the perfect endurance of the formwork. The direction it should be inserted in and the direction of rotation of the handles don't affect the formwork's endurance. Panels without holes.
 |
 |
 |
||
1. |
2. |
3. |
||
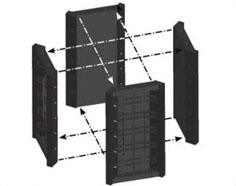
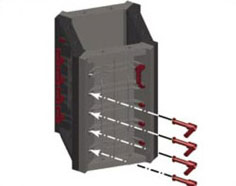
| Join the 4 sides formed Geotub panel elements; | From the bottom, start with the insertion of the appropriate nylon handles in the holes situated along the two longitudinal joints.Then turn each handle by 90° to lock the parts; | The last handle along the joints needs to be inserted in the opposite direction and then locked turning the handle downwards by around 90°; | ||
 |
 |
 |
||
4. |
5. |
6. |
||
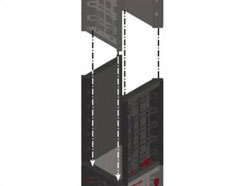
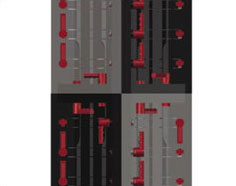
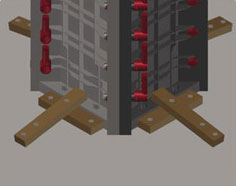
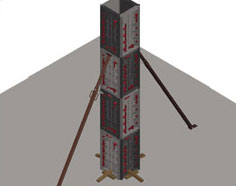
| Once the first four column's elements are assembled, do the same thing with the four upper elements which will be fixed to the bottom ones through the handles; | The handles grip that are fixed to the diagonal joint will face upwards or downwards in order to not interfere with the clamping of the other handles, (Figure n°5 shows the ideal assembly of the handles); | Once the Geotub panel column assembly is completed, fix the base to the bearing surface with simple wooden slats nailed to the ground. | ||
 |
 |
|||
7. |
8. |
9. |
||
| Geotub panel plumbing it's easy and fast. It's sufficient to shore up the formwork in two parts only. You can use an extensible flat plate pilar. No releasing agents needed. | Holes placed at the two opposite sides | Column with holes in all sides |
Notice: ob_end_flush(): failed to delete and flush buffer. No buffer to delete or flush in /home/johnroe/public_html/inc/footer.php on line 217


